

This illustrated guide shows how to route and connect the Light Bee battery discharge cable, including the controller-side phase wires, waterproof signal connector, and battery-compartment main leads.
Quick Summary
- Estimated time: 30-60 minutes
- Difficulty: Intermediate to advanced
- Core caution: Power off first, match wire colors, and protect the harness from abrasion.
Safety Notice
This cable is part of the high-current power circuit. Power off the bike and disconnect the battery before installation. Do not allow the positive and negative terminals to short. Stop immediately if you notice sparking, heat, odor, or a loose connector.
Preparation
- Power off the bike and remove or disconnect the battery before touching the harness.
- Prepare basic hand tools, cable ties, protective sleeves if needed, and a clean working area.
- Inspect the discharge cable, phase wire terminals, signal connector, and insulation before installation.
- Use the actual kit manual for connector specifications or torque values that are not visible in this guide.
Step-by-Step Installation
Step 01. Power off the bike and expose the controller-side harness
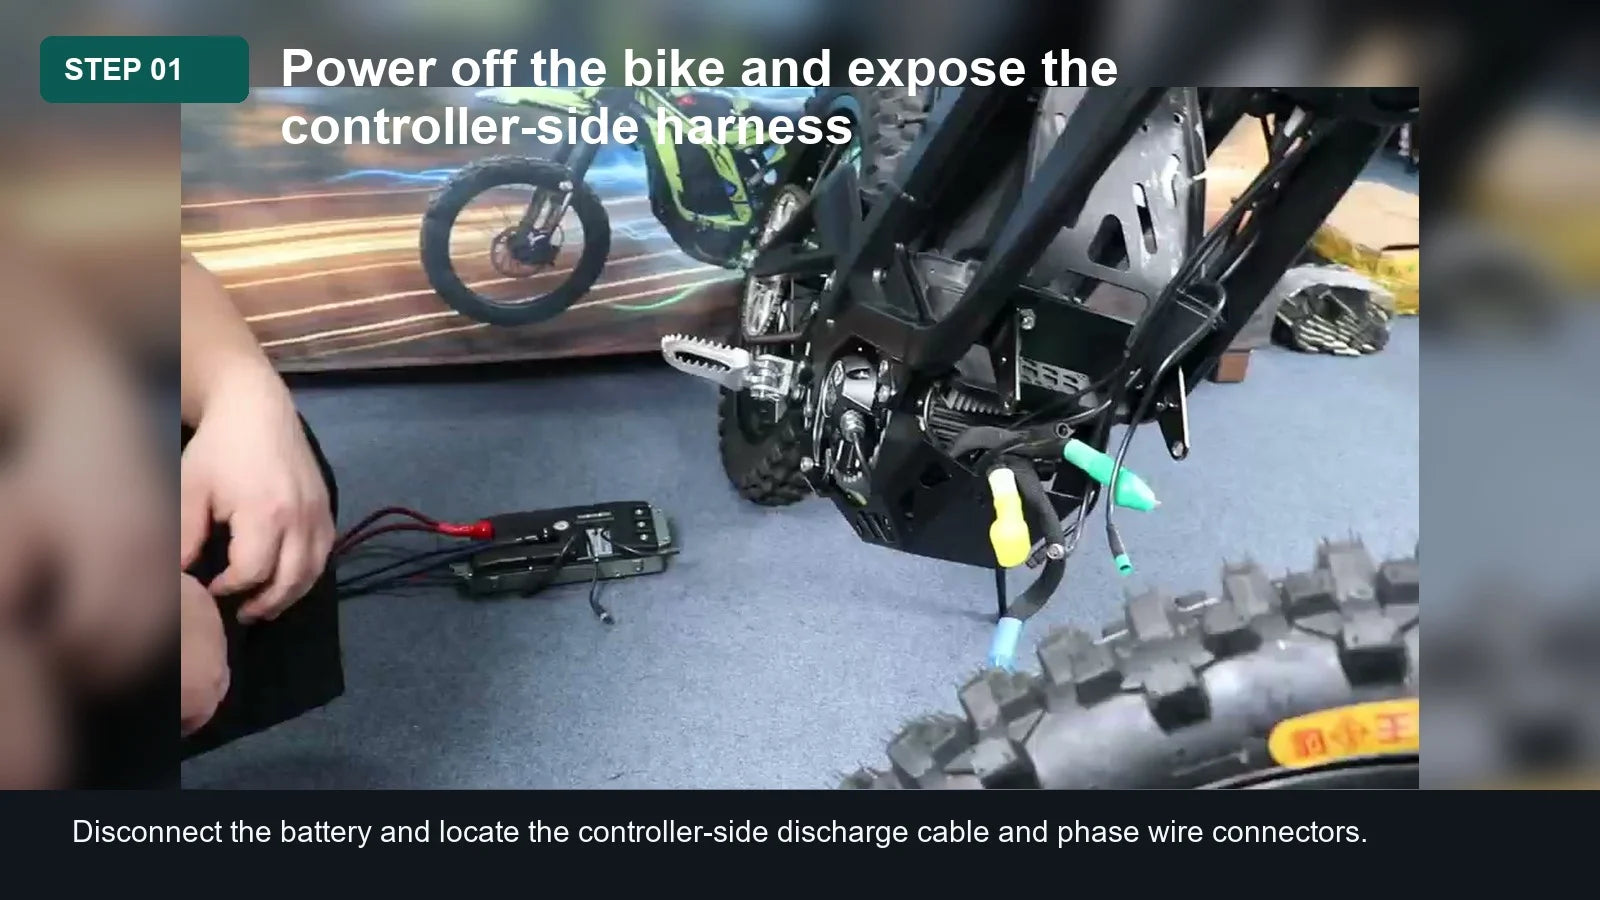
Turn the bike off, remove the battery, and keep the main connector away from metal parts. Open the controller-side area so the discharge cable, phase wires, and signal connectors are visible before making any connections.
Step 02. Identify the yellow, green, and blue phase wires
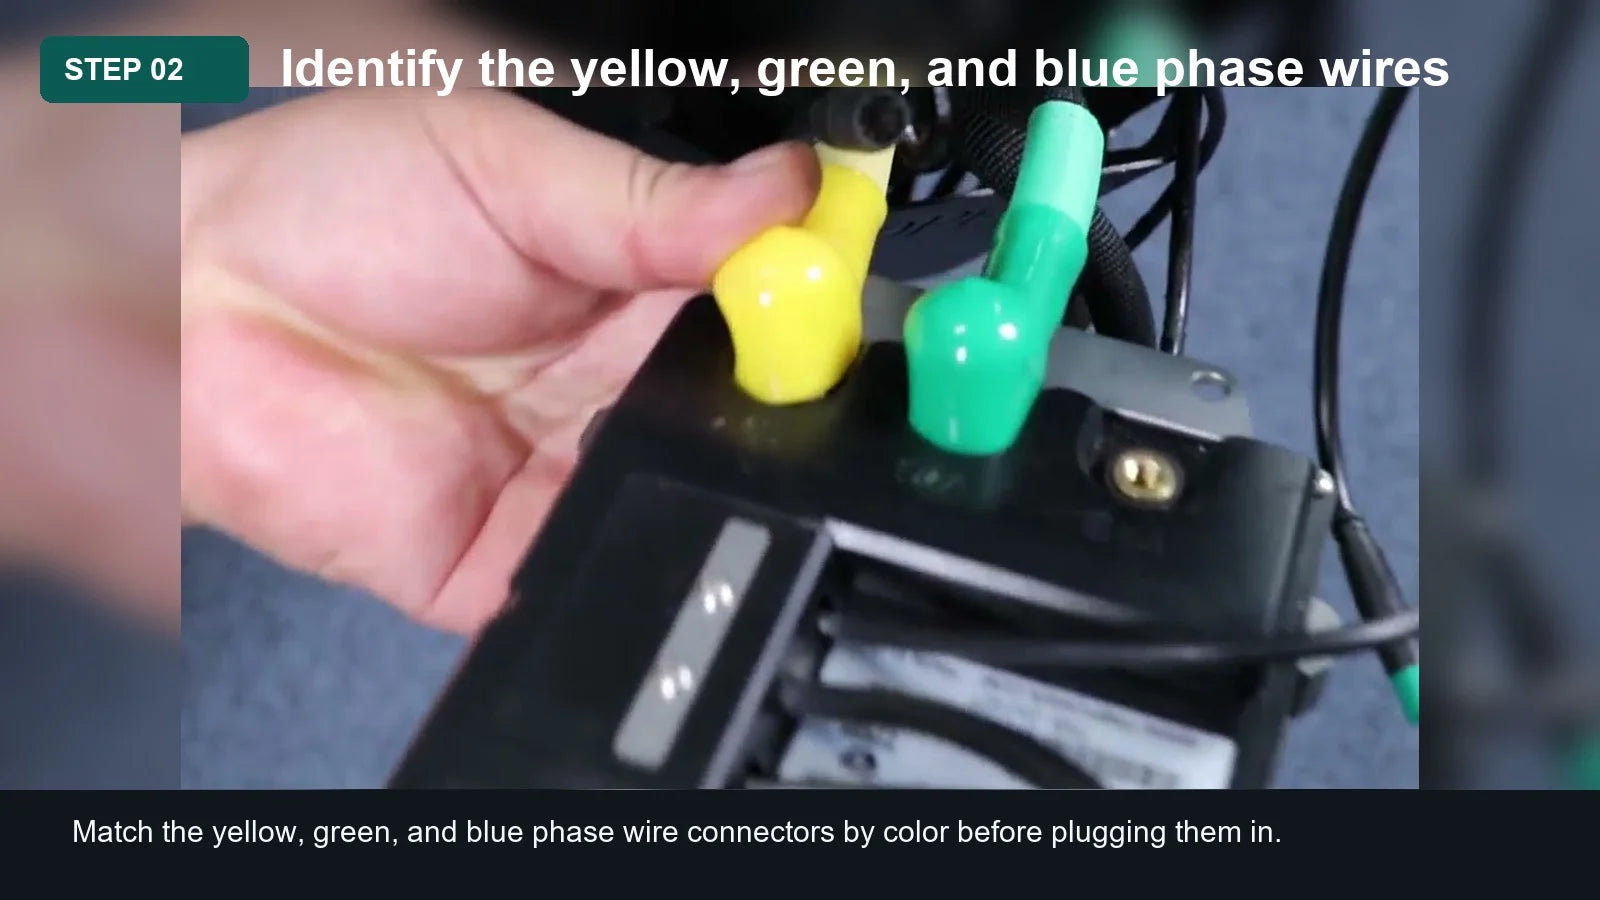
The three large color-coded phase wires should be matched color to color. Do not force a terminal if the connector angle or color does not match the harness layout.
Step 03. Confirm the phase wire connectors are fully seated
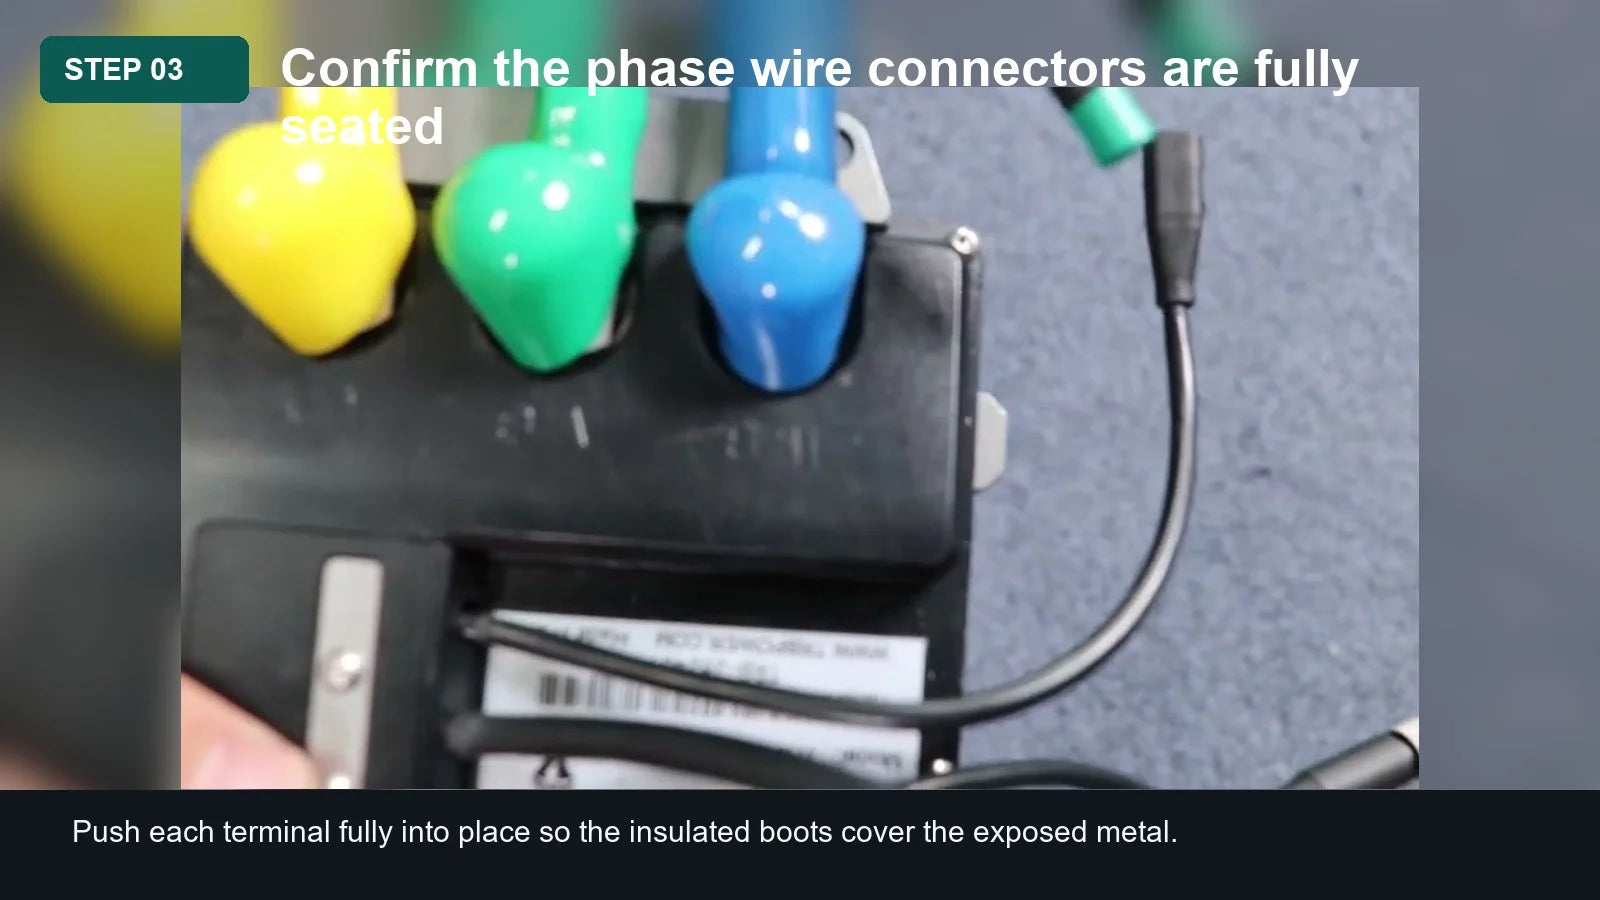
After each connector is joined, check that the terminal is seated firmly and that the rubber boot covers the metal contact. A loose phase wire can create heat and unstable power delivery.
Step 04. Lock the signal or waterproof connector
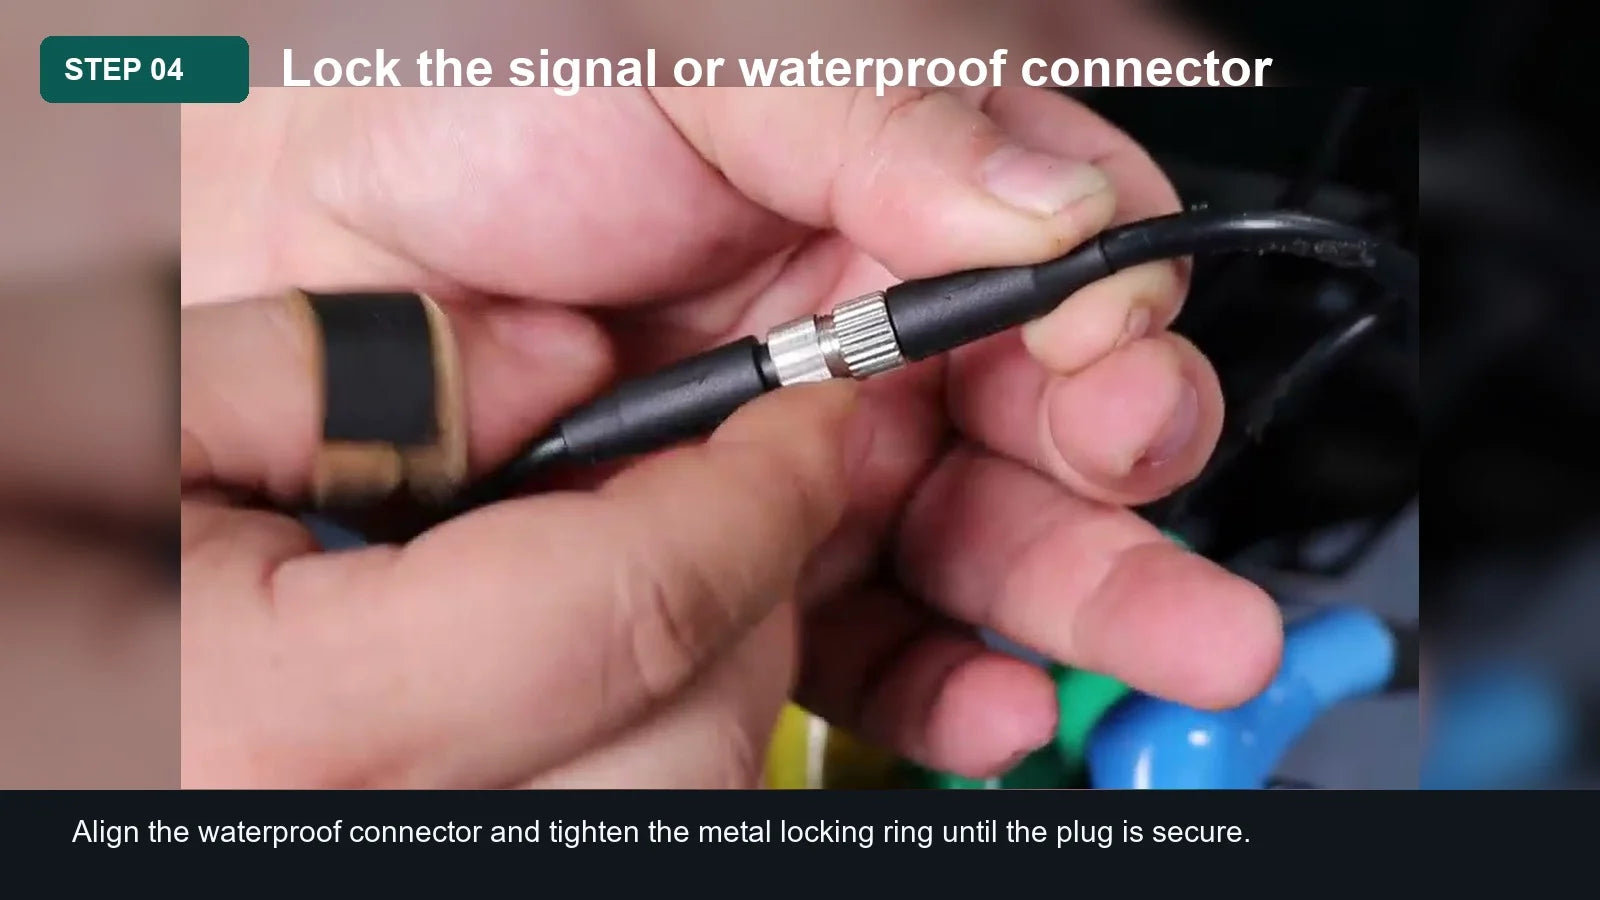
Line up the plug before tightening. The locking ring should thread on smoothly; if it binds, back it off and realign the connector rather than forcing it.
Step 05. Organize the controller-side harness
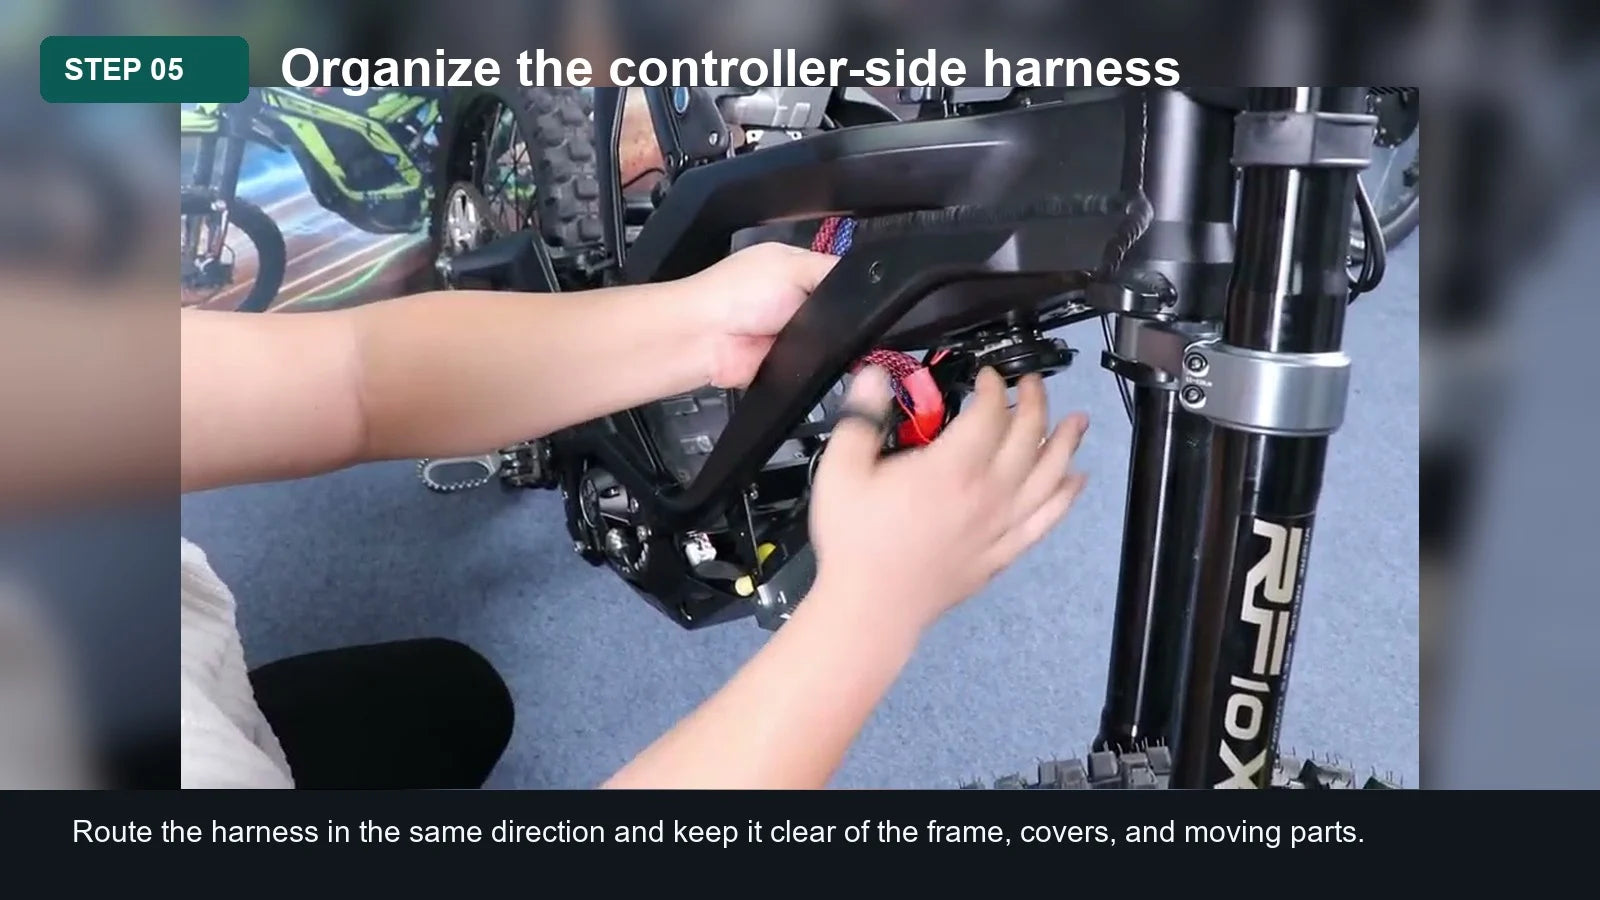
Bundle the wires neatly above the controller area. Leave a small amount of service slack, but avoid loops that can rub on the tire, suspension, or side cover.
Step 06. Open the upper frame routing channel
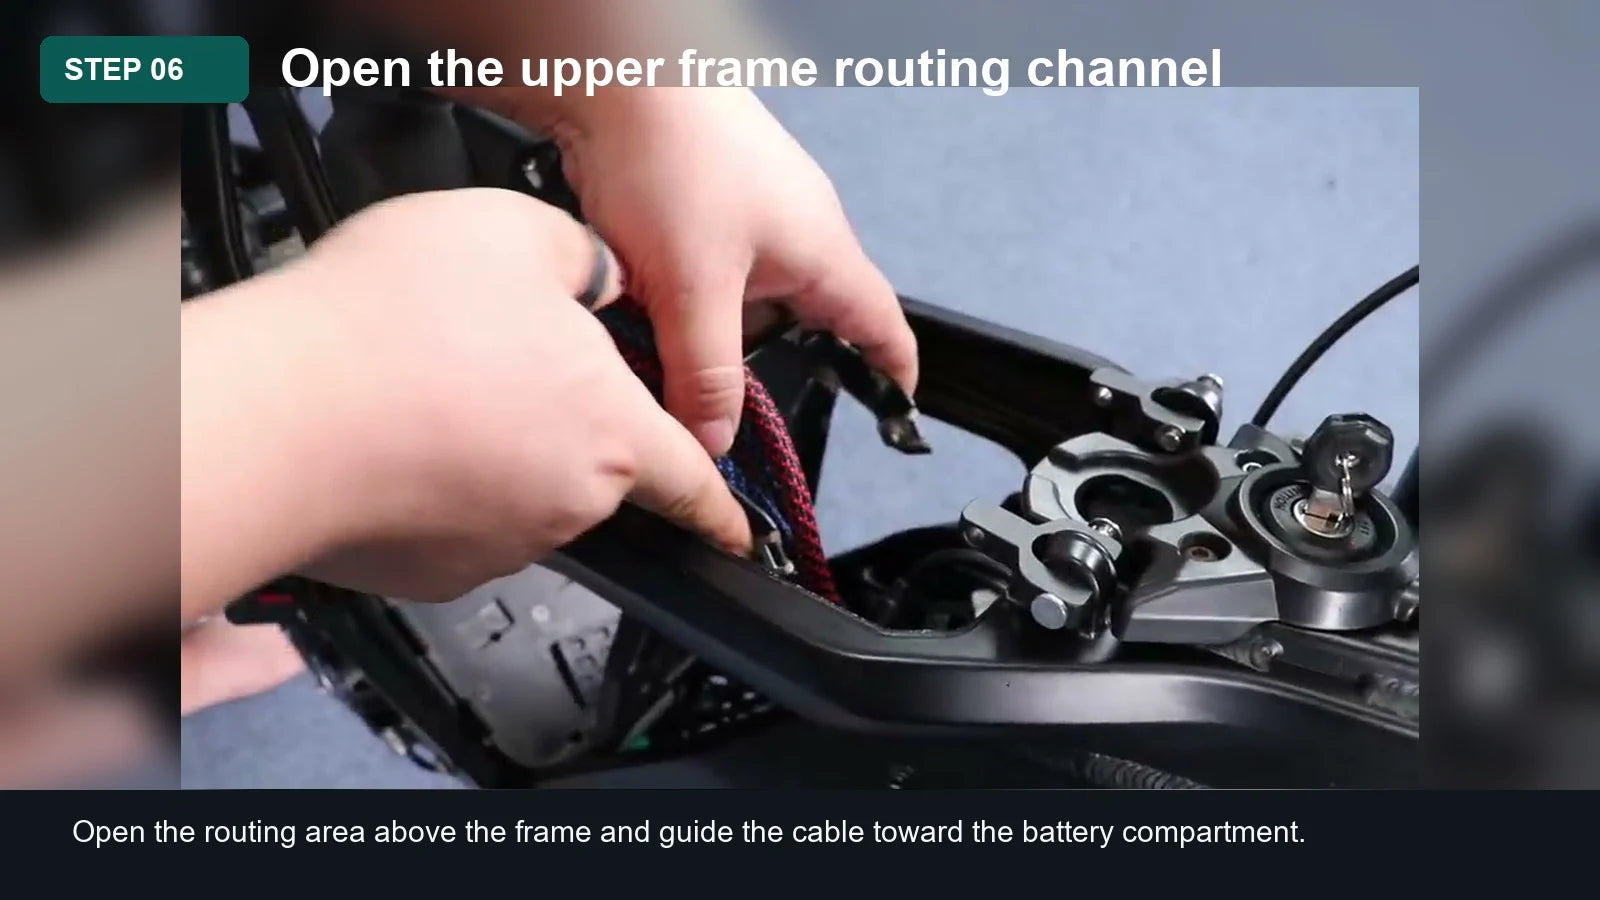
Feed the discharge cable along the original routing path where possible. Keep the cable away from sharp frame edges and any area that will be compressed by the battery.
Step 07. Prepare the battery compartment for routing
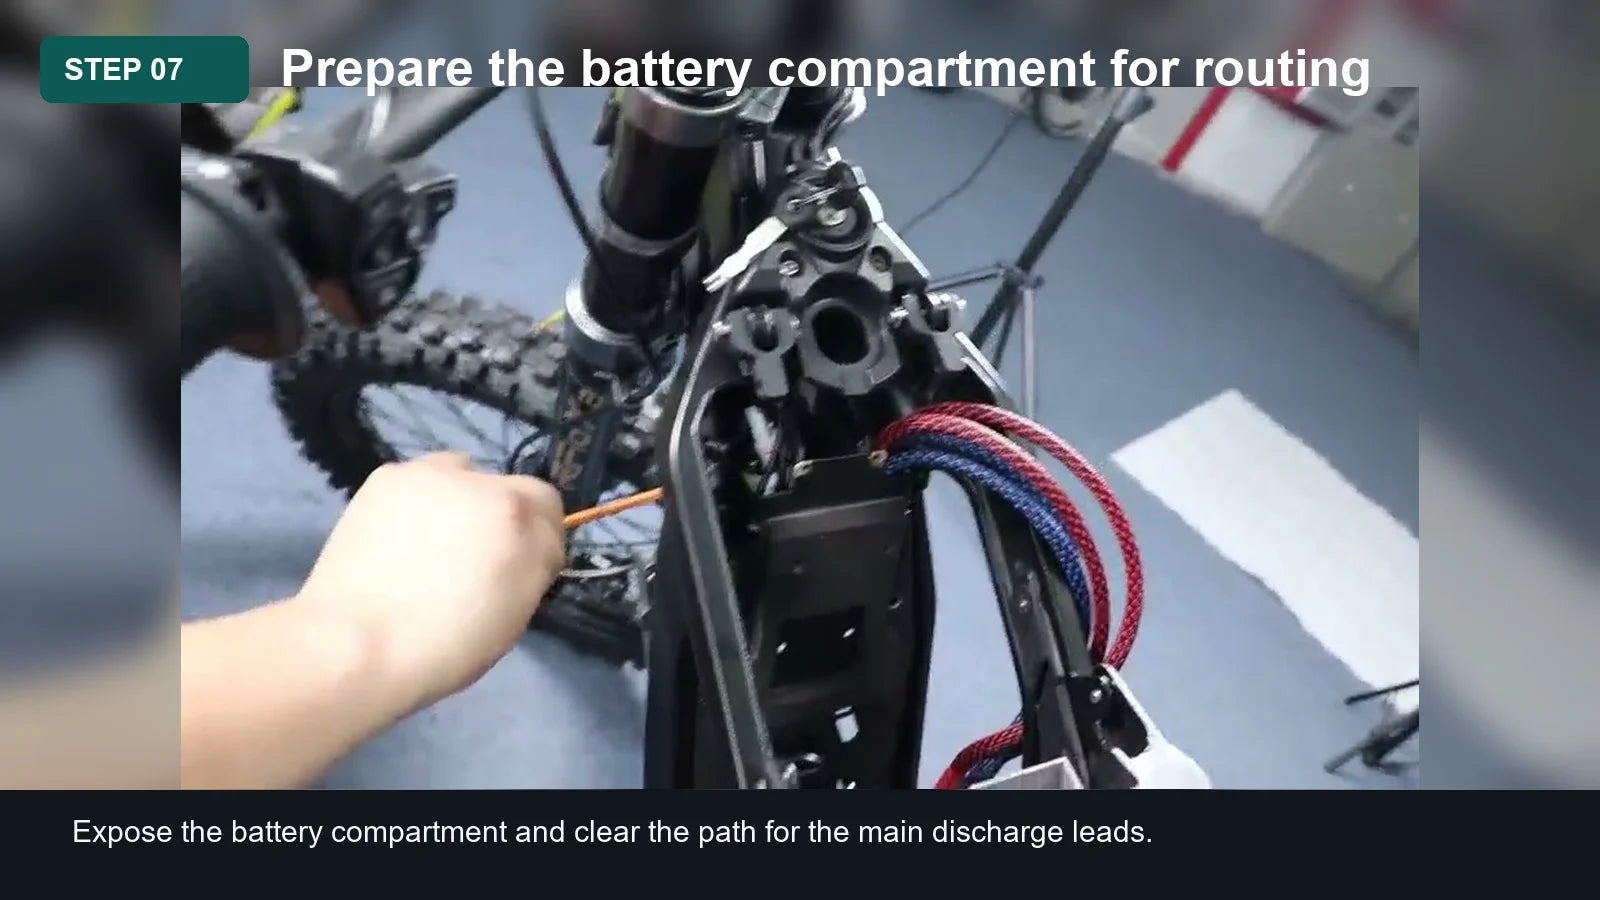
Before routing the main leads, confirm that the battery tray is clear. The cable should sit along the side of the compartment, not directly under the battery pack.
Step 08. Route the main leads into the battery compartment
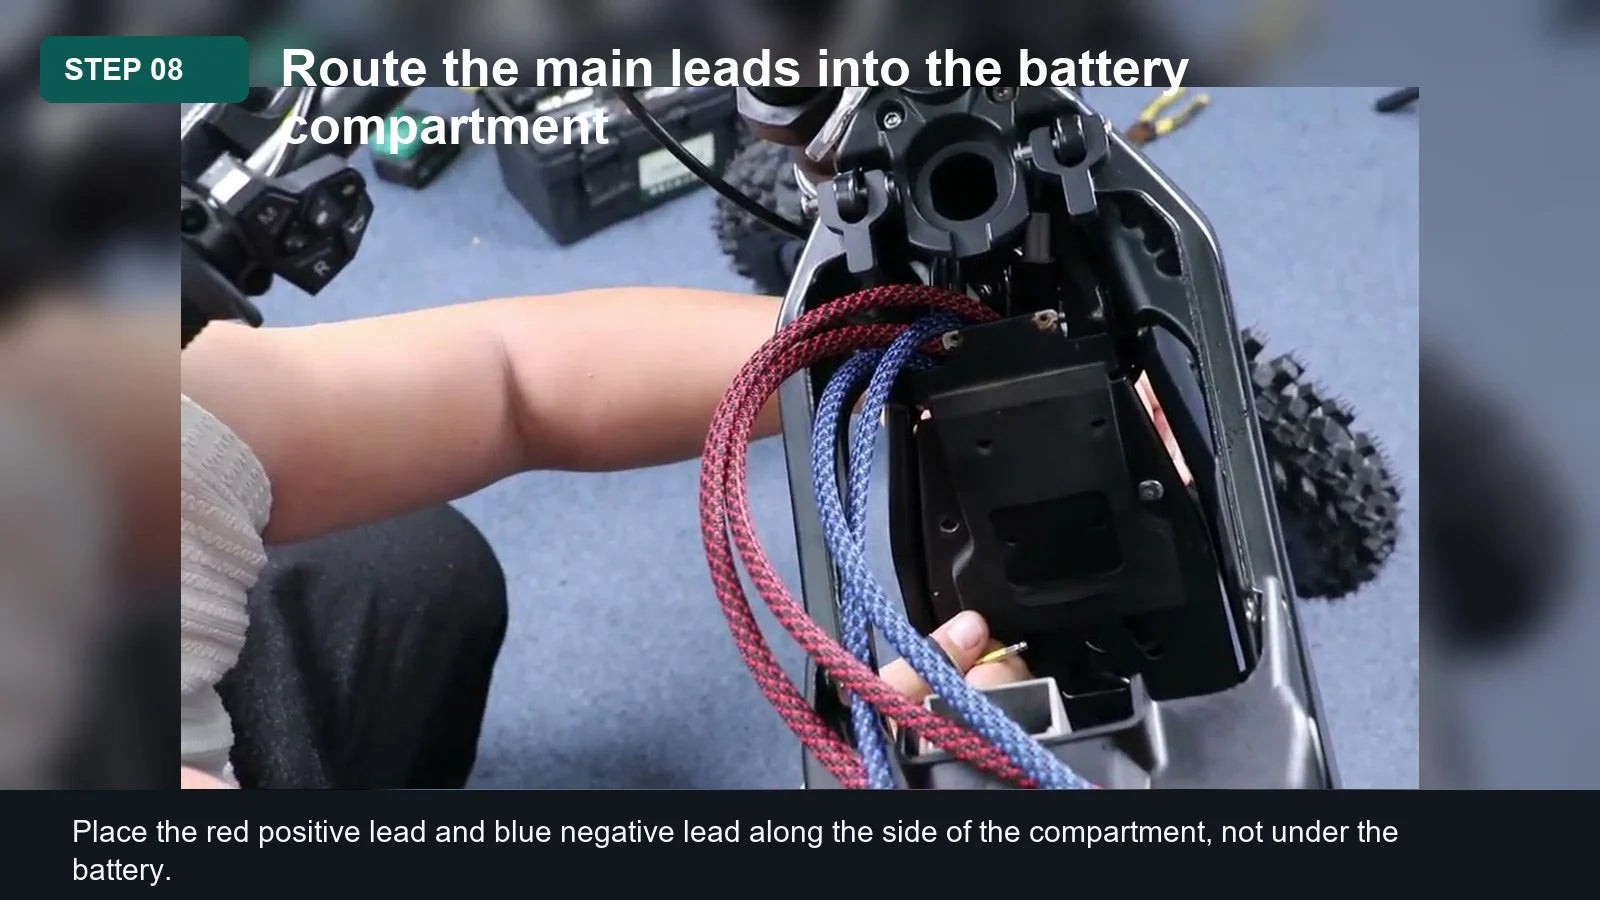
Guide the red positive lead and blue negative lead into the battery compartment with smooth bends. Avoid tight bends near the terminals or connector boots.
Step 09. Secure the terminals and harness inside the compartment
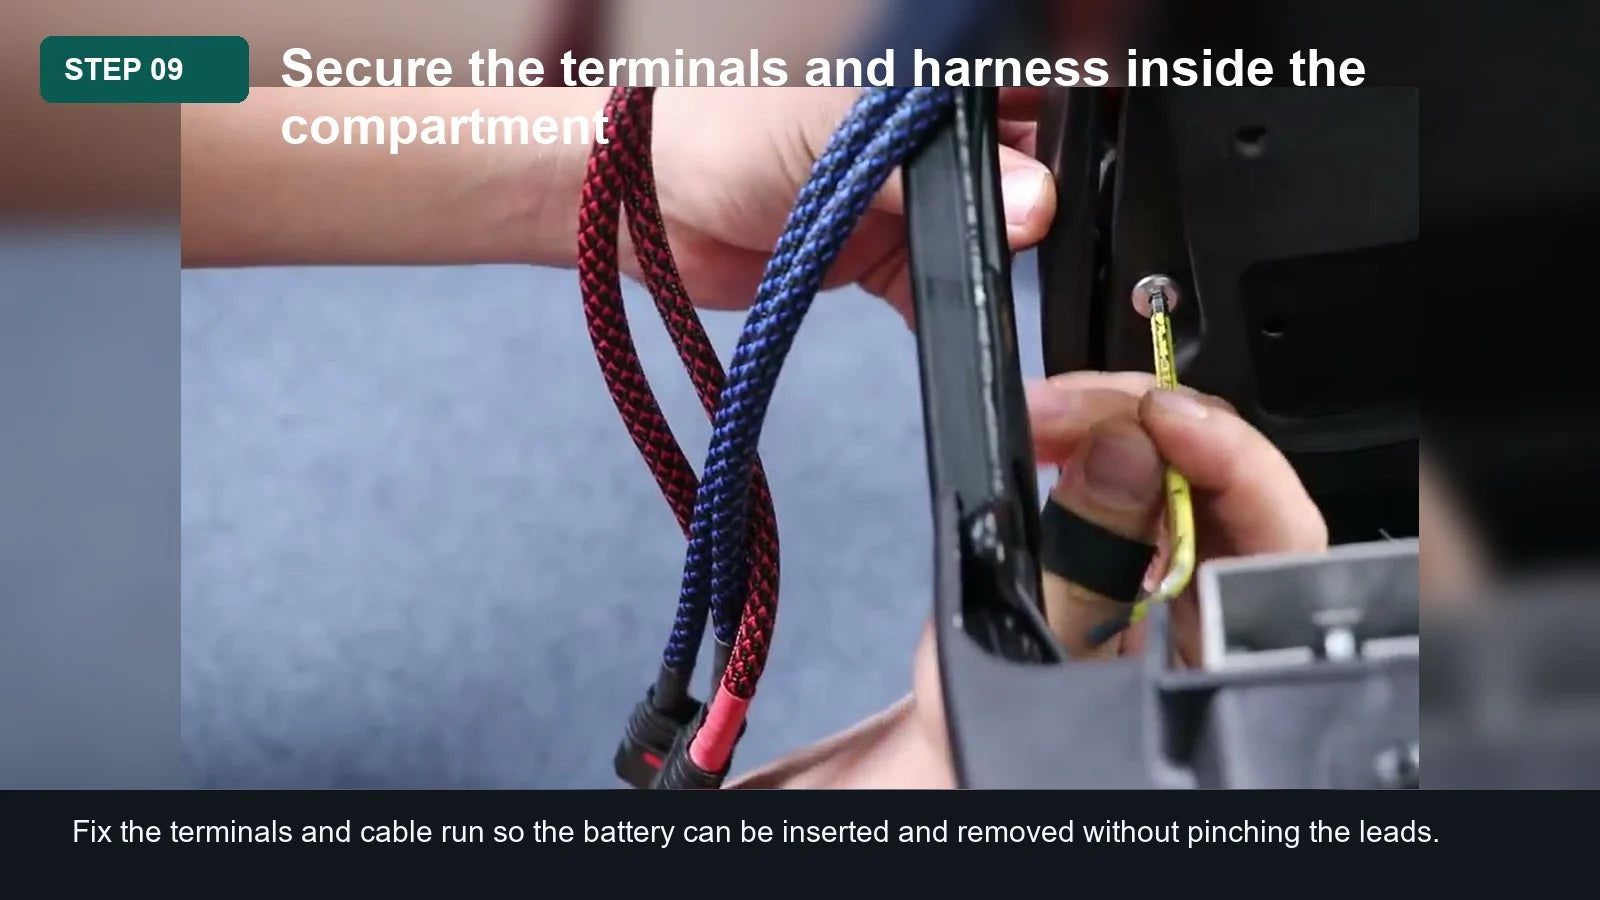
Once the terminals are in position, check that the battery can slide in and out without catching the harness. Add cable ties only where they do not create pressure points.
Step 10. Reinstall the cover and perform a final check
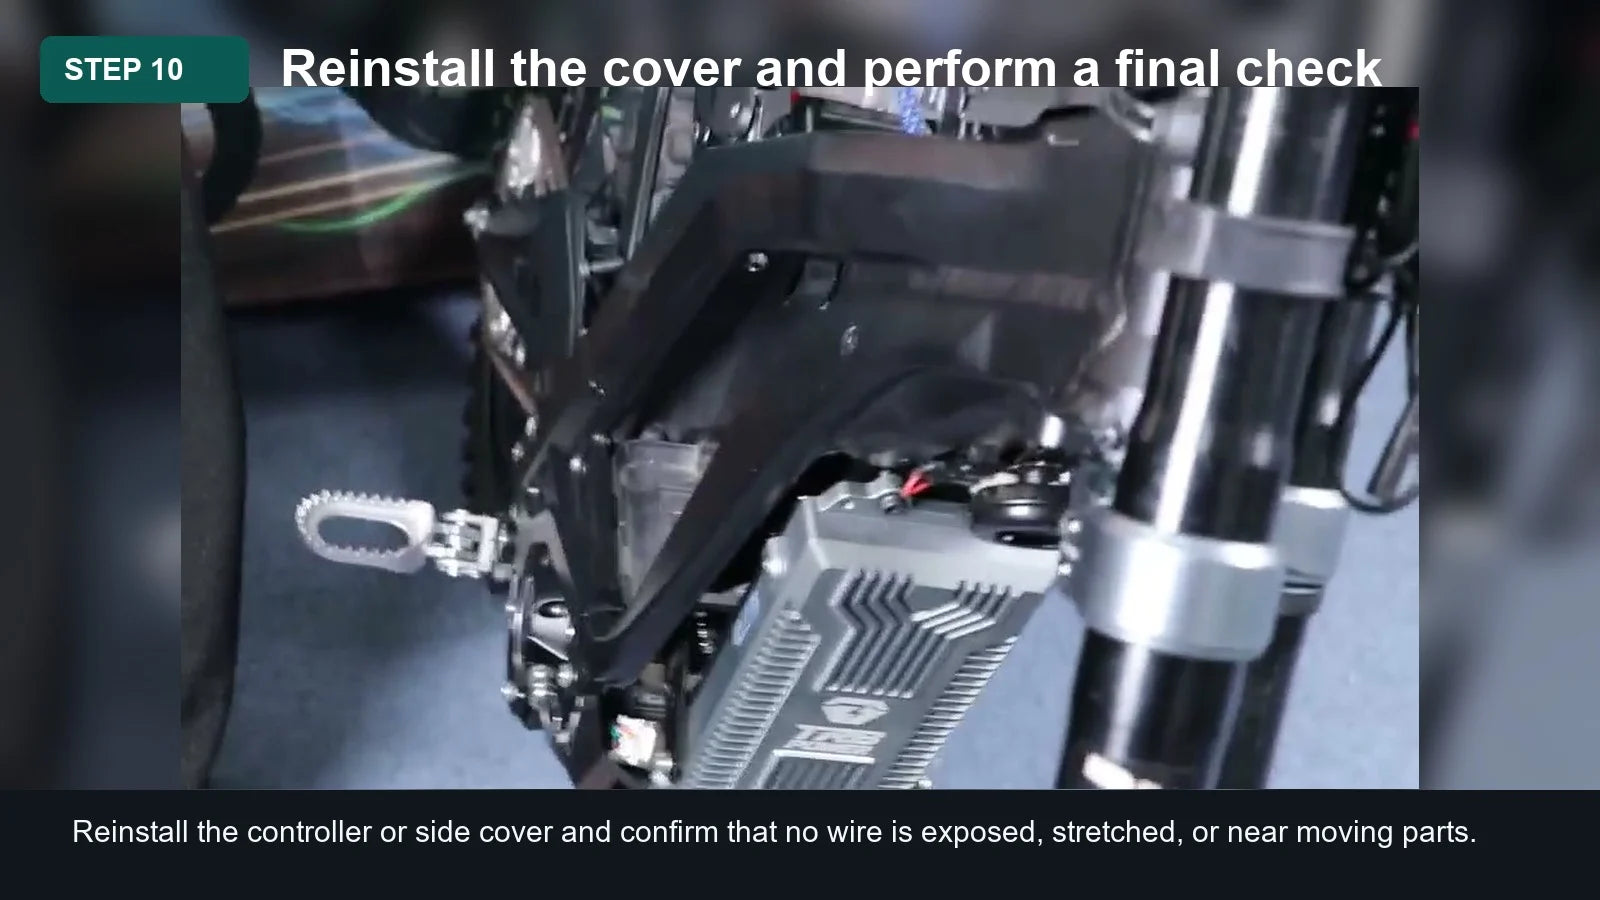
Refit the cover, then inspect the full route from the controller to the battery compartment. Reconnect the battery only after all connectors are secure and the cable is protected from abrasion.
Post-Installation Checks
- Confirm every connector is fully seated and color-matched.
- Confirm the red positive lead and blue negative lead are separated and cannot short against each other.
- Check that the harness is not pinched by the cover, battery, or frame.
- Reconnect the battery only after the cable path is secure and the bike is stable.
- Perform the first power-on test gently and stop immediately if there is heat, odor, sparking, or abnormal behavior.
FAQ
Can I change the wire order if the connectors fit?
No. Match the visible color-coded phase wires and follow the kit instructions. Do not swap phase wires or power leads based only on connector shape.
Should the main leads sit under the battery?
No. Route the main leads along a protected side path so the battery does not crush or pinch the cable.
What should I do if a connector feels loose?
Do not ride the bike. Power off, disconnect the battery, and inspect the connector or contact the kit supplier before testing again.


